PDF-XChange
Information about the version
These instructions were written with PDF-XChange Editor Plus, version 10.7.6. Please check whether your application has the same version. Processes in other versions may differ.
Sign document
PDF files can be electronically signed in PDF-XChange. The following instructions explain the process of digital signing. To configure digital signatures, please read the section Configuring digital signatures with a Harica certificate.
1. select the Sign document field in the Protect tab. The field is then highlighted in yellow.

2. move the mouse pointer over the desired document and confirm the signature position by clicking the left mouse button. A menu will then open.

3. select the appropriate certificate for the signature. If necessary, specify the details of the signature. The Standard signature template is selected by default. A preview of the signature is displayed in the lower field.
4. confirm your entries with OK.
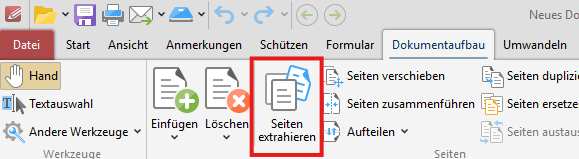
Extraction of pages
The extraction of pages is used to create individual pages from a PDF document as a separate document.
1. click on the Extract pages field in the Document structure tab. A new menu opens.
2. select the appropriate options for your document:
- Pages determines the number of pages you extract from the document. With Current, you only extract the page you are currently on. With Custom, you extract a specific page interval.
- Subset allows you to extract all pages with an (odd) number of pages.
- Type determines the destination for the extracted pages.
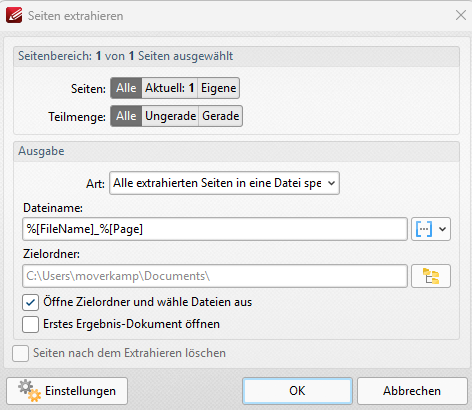
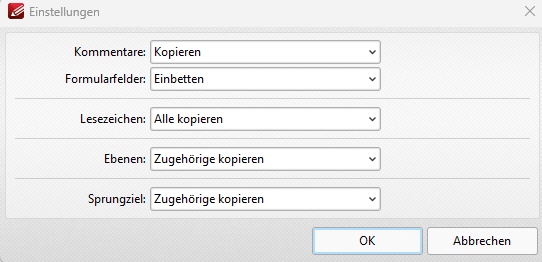
3. in the settings, you have the option of accepting or rejecting any annotations on the pages during extraction.
Configuration of digital signatures with a Harica certificate
For digital signatures with a Harica certificate, it is first necessary to import the certificates on your operating system. These instructions assume that the corresponding steps have already been carried out.
1. select the Digital IDs field in the Protect tab.

2. in the Windows Digital IDs area, you can determine whether your certificate has been recognized. Windows Digital IDs are automatically recognized if a certificate is present on your PC.

Recognize text on pages
PDF-XChange's Optical Character Recognition (OCR) function can also recognize handwritten or scanned text. This is particularly useful for scanned documents, as the content can then be edited and marked up, just as with purely digital PDFs.
1. open your document in PDF-XChange Editor.
2. click on the Recognize text on pages field in the Convert tab.

3. a menu opens. The configuration options are explained below:
- Pages determines the number of pages from the document on which text is to be recognized. With Current, only text on the page you are currently on is recognized. With the Custom option, text within the specified page interval is recognized.
- Subset allows you to extract all pages with an (odd) number of pages.
- In the settings for text recognition, you specify the languages in which text is to be recognized. This is particularly important to ensure that words are recognized accurately. The accuracy is set to Auto by default. If the results are not satisfactory, this can be set to High.
- The output settings offer selectable options for correcting distortions or the option of creating a new document from the recognized text.
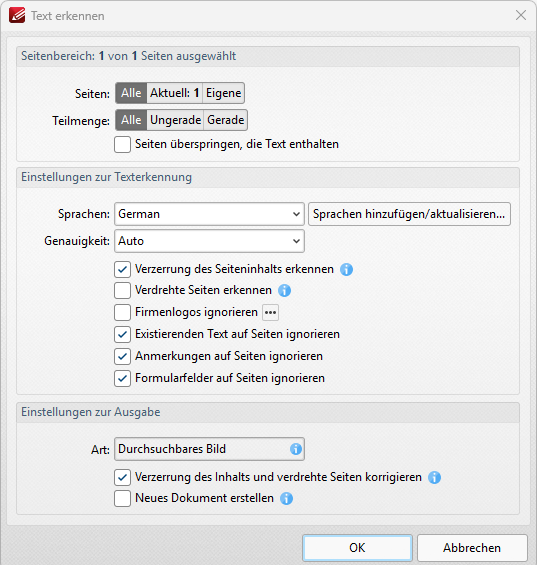
4. confirm the selection with OK to recognize the text on pages. The progress is indicated by a loading bar.
5. now open the Content menu on the left-hand side of your window. You may need to expand the menu first to display the options.
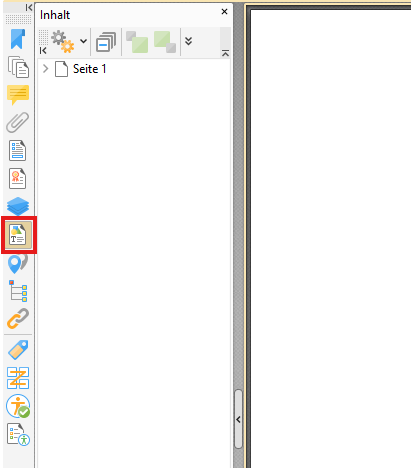
6. when unfolding the pages, you will find the recognized text as text fields above the image. You can now adjust the text by double-clicking on the text layers in the list.
7. to move all text fields to a layer, select all text fields in the Contents menu window and right-click on them. Now select the Move to new layer option. A new menu opens.
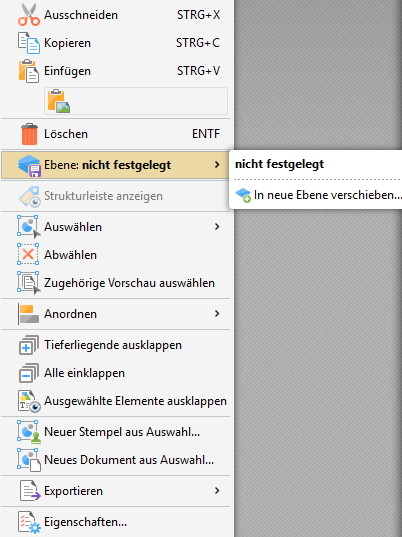
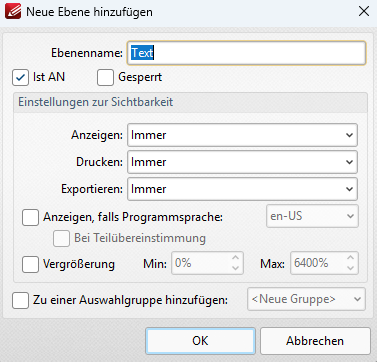
8. select the appropriate options and confirm with OK. The text fields have been moved to a new level in the Contents menu window.
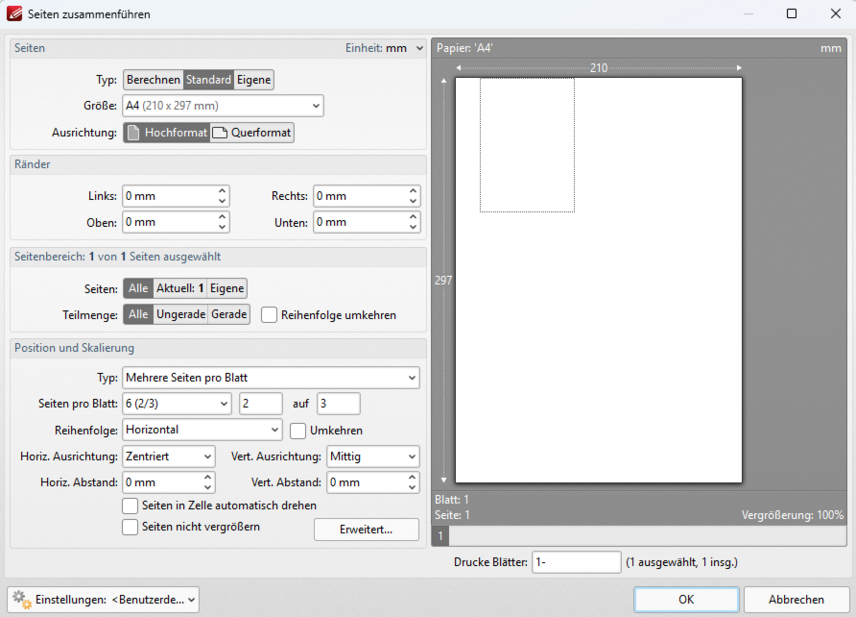
Merging pages
The option to merge pages is used to display several individual pages on one sheet. PDF-XChange offers various options for the structure of the merged document.
1. select the Merge pages field in the Document structure tab. A new menu opens.

2. select the appropriate settings for your pages. These are similar to the page settings in word processing programs. The individual options are explained below:
- Under Pages, you determine the size of the page (A4 by default) and the orientation.
- Under Margins , you specify the distance to the page content in millimetres (mm) individually for each page of the document.
- In the Page range field under Pages, you define the scope of the affected pages from your document. Use Current to extract only the page you are currently on. Use Custom to extract a specific page range.
- Subset allows you to extract all pages with an (odd) number of pages.
- Position and scale determines the position of the respective pages in the merged sheet as well as the orientation of the pages on the sheet.
- Type offers the option between multiple pages per sheet (portrait format by default) and booklet orientation (landscape format with two pages by default)
- Pages per sheet calibrates the number of pages on the sheet in a row. In the first input field, you specify the number of pages per sheet. The pages per row in the second field. The number of rows in the third field.
- Order determines the horizontal or vertical sequence of the pages.
- The following alignment options are used to position the pages precisely on the sheet.
- Under Advanced, you have the option of accepting or rejecting any annotations on the pages during extraction.